Showing posts with label Published Item. Show all posts

Monday, August 27, 2012

Published Altered Item - Cricut I.B - Quick & Easy April/May 2012

The following Birthday Wishes 3D cake Box was recenlty pulbished in the Cricut Idea Book - Quick and Easy in April/May 2012!

Birthday Wishes - Page 98 & 99

Birthday Wishes Cake Box:  Patterned Paper:  Echo Park - Sweet Summertime, Ribbon Stamps & Ink:  PTI, Cricut Expression, Cricut Cartridge:  Tags, Bags, Boxes & More, EK Success Border Punch.
  1. Using the 12 x 12 Cricut Mat cut the on Page 126 of the Tags Bags Boxes and More Cricut cartridge using the Fit to page feature to fill the full piece of blue cardstock.
  2. Cut the same in white cardstock.
  3. Cut the White cardstock cut piece where the Score lines are and trim around 1/8” from all sides to create templates to use for your patterned Paper.
  4. Score the Blue cardstock cut using the score lines and fold and put together the cake box base.  
  5. Using the white pieces as templates cut the sides of the cake in the striped pp
  6. Using the triangle white piece cut the flowered pp
  7. glue to cut pieces to the cake box
  8. Before attaching the back of the cake with the patterned paper cut a 2 inch strip of yellow pp and use a Ek Success Punch to create a scalloped edge – score just below the punched edge and glue to the cake box at the top back.
  9. Punch a tag with the Marvey Punch and stamp sentiment on tag in Black Ink.
  10. Tie ribbon through the tag and around the box flap before sealing the back of the cake box.
  11. Hand cut small blue flowers from pp and pop dot them off the top.  Glue blue bling to the centre of the flower.


Saturday, August 25, 2012

Published Card - April 2012 Cricut Magazine

The following card was published in the April 2012 Cricut Magazine!

Just Hatched - Page 73

Just Hatched:  Patterned Paper:  Best Creations, Ribbon:  May Arts, Stamps & Ink:  PTI, Cricut Expression, Cricut Cartridge:  Simply Charmed.

  1. Using the Simply Charmed Cricut Cartridge cut 2 of the found on Page 35 at 4 ½” in white cardstock.
  2. Cut the same in Yellow Cardstock.
  3. Using the Layer 2 and shift button cut the egg shell in the Blue Patterned Paper.
  4. Using the Layer 3 and shift button cut the birds beak in orange cardstock.
  5. Score one of the white cardstock shapes at ¾” and glue the top portion of the white cut to the second white card cut.
  6. Glue the Yellow cut on top of the white cardstock card base, making sure to tape down the Yarn pieces before gluing
  7. Pop Dot the Patterned egg shell on top of the Yellow card base.
  8. Glue the orange Bird Beak
  9. Apply the Black pearls as eyes
  10. Stamp sentiment in black ink on white cardstock and trim around the sentiment.
  11. Glue sentiment on card
  12. Tie a bow and attach it on the corner of the sentiment using a glue dot


Wednesday, August 22, 2012

Published Layouts - Cricut Idea Book Feb/Mar 2012 Families

I recently had 3 Layouts published in the Cricut Idea Book - Family's that was recently issued in February/March of 2012.  

 
Splish Splash - Page 74 & 75

Tea Party - Page 84 & 85

We Are Family - Page 90 & 91

Splish Splash:  Patterned Paper:  Echo Park - Sweet Summertime, Craft Felt, Floss, Stickles, Punches:  Ek Success Treading Water, Cricut Expression, Cricut Cartridge:  H20 (Title & Beach Ball), Simply Charmed, Leaves for flower, Cuttlebug, Flower Dies (Cuttlebug), Sewing Machine.

  1.  To create Beach Ball feltie cut the Ball and layer in white cardstock at 1 ¾” Glue the white cardstock circle to the blue felt and the layer cardstock to the orange felt and hand cut around the shape.  Glue the orange piece to the blue circle.  Glue an orange button to the centre top of the ball and add  a green coloured pearl to the centre of the button.
  2. Create 3 leaves for the flower by using the layer 3 with the Real Dial Size Button turned on at 1” in white cardstock.  Glue the White cardstock to the green felt and hand cut each of the 3 leaves out.  Hand stitch down the centre of each of the 3 leaves using green embroidery floss.  Cut an Orange Flower and a Blue flower out of felt using a Cuttlebug and the Flower cuttlebug dies  Glue the flowers and the leaves together to create the flower feltie and add a green button to the centre.
  3. Handraw gridline with pencil on white cardstock insuring that there are 6 rectangles approx 3 ½” wide by 4 ¾” long.  With Orange Thread in the sewing machine sew over hand drawn gridlines and erase any remaining pencil markings. 
  4. Cut 3 pieces of the Blue pp to 4 ¾” x  3 6/16” and glue to the appropriate markings on the grideline. 
  5. Cut the 3 photos to the same size of the patterned paper and glue to remaining squares of the gridline.
  6. Cut the Echo park Die cut shape from the pp and glue in the first square and write the journaling.
  7. Attach the Flower Feltie that was created earlier.
  8. cut 3 7” strips of blue cardstock and trim the long edge with the EK Success treading water punch to create the waves.  Using Blue Stickles cover the bottom and top of the strips of waves.  Pop dot the 3 layers of waves on the layout in the bottom right corner to give dimension.  Add the Beach Ball Feltie created earlier.
  9. Hand cut 8 circles from the pp and trim off the bottom edge of each circle.  Glue to the top left of the layout.
  10. Using the H2O Cricut Cartridge cut the phrase Splish Splash in both green cardstock and blue cardstock at 3 ¾”  Trim the water spash marks off of the green cut and glue the green to the blue.  Pop dot title off the page and add green stickles to the green portion of the title.  Then add glossy accents to the blue water spash marks to make it look more like water.  


Tea Party:  Patterned Paper & Diecuts:  Kaiser Craft (Candy lane), Cricut Expression, Cricut Cartridges:  Cricut Cake-Birthday cakes (title), Circle Punch - EK Success, Ribbon:  May Arts. from the Pink Dot pp cut a 10 1/2” x 10 ½” square.
  1. Using the Circle Punch cut 8 circles from the stripped pp.
  2. Glue circles to the back of the pink square making sure to overlap them a bit to create a scalloped edge.
  3. Glue the pink square 10 ½” Square to the Orange PP
  4. Create a flower using the Green dot with Pink scalloped circle die cut and attaching the orange felt flower to he centre.  Then attach the chipboard flower to the centre of the orange felt flower.
  5. Attach all 3 photos and then glue down flower in bottom left corner of the photo making sure to overlap a part of the flower on the photo.
  6. Hand cut the banner from the pp and pop dot it from the layout over the top left photo.
  7. Make 2 bows using the ribbon and attach on either side of the banner
  8. Using the Cricut Cake – Birthday Cakes Cricut cartridge cut the word Tea Part in the green pp at 3 ¼” using the Plain Phrase feature and the double hearts.
  9.  Cut the layer Party in orange using the shift key along with the Plain Phrase Feature.
  10. Glue the Orange word “Party” to the Green cut phrase.
  11. Pop Dot the Tea Party Title on the layout
  12. Glue the Tea pot Chipboard shape just above the word on a slight slant.of the strips of waves.  Pop dot the 3 layers of waves on the layout in the bottom right corner to give dimension.  Add the Beach Ball Feltie created earlier.
  13. Hand cut 8 circles from the pp and trim off the bottom edge of each circle.  Glue to the top left of the layout.
  14. Using the H2O Cricut Cartridge cut the phrase Splish Splash in both green cardstock and blue cardstock at 3 ¾”  Trim the water spash marks off of the green cut and glue the green to the blue.  Pop dot title off the page and add green stickles to the green portion of the title.  Then add glossy accents to the blue water spash marks to make it look more like water.  
We Are Family:  Patterned Paper:  SEI (Addison) & Bella Blvd (Family Tree), Ribbon:  American Crafts, Fun Foam, Chipboard: Making Memories, Corner Rounder:  EK Success, Martha Stewart Fringe Siccors, Cricut Expression, Cricut Cartridge:  Seranade (tree), Cuttlebug, Cuttlebug Letters, Quickutz Cloud Die, Spellbinder (Butterfly), 
  1. Cut Blue PP to 4 ½” x 12” inches and trim one 12” edge with the Cutter Bee Paper Trimmer using the Scallop Blade.
  2. Cut the Orange PP to 6” x 5 1/4”
  3. Cut the Striped PP to 1” x 12”
  4. Cut the Green PP to 1¾” x 12” and trim one 12” edge with the Cutter Bee Paper Trimmer using the Scallop Blade.
  5. Cut the Blue PP first to the Brown Cardstock, then the Orange pp
  6. Hand cut 3 pieces of Green PP to create the hills for the tree.  Using the Martha Stewart Fringe Sissors create a grass look to 2 of the hills.  Place one of the hills overlapping the orange cardstock.
  7. Cut the Tree on the Cricut using the Green Bling Cardstock at 7”
  8. Cut the Tree trunk using the Layer Feature in Brown Cardstock at 7”  and glue the trunk on top of the green tree.
  9. Glue the tree to the layout on top of the hill
  10. Add the other 2 layers of the hill
  11. Cut a 2” x 1” strip of beige cardstock and using the corner round round the 2 edges.  Using a green gel pen write the date of the picture and place over the final hill
  12. Attach photo making sure the tree leaves overlap the photo a little
  13. Glue down the stripped pp and the green pp with the scallop edge trim
  14. Glue the ribbon to the layout over the striped pp.
  15. Glue the Making Memories word Family above the phot
  16. Cut 2 clouds using the Quickutz Die from white craft felt
  17. Cut the letters for the rest of the Title “We Are” using the Cuttlebug dies from Black Fun Foam)
  18. Glue the clouds to the layout and glue the Letters to the Clouds
  19. Using the small butterfly from the Spellbinder die set cut one brown butterfly from craft felt.
  20. Glue the felt butterfly to the letter Y on the word Family. 
  21. Glue the 3 pink bling hearts to the centre of the butterfly. 


Monday, August 20, 2012

Published Card - Cricut Magazine March 2012

Here is a card I had published in the March 2012 Cricut Magazine, Page 21


Details:  Cricut Expression, Cricut Cartridge:  Simply Charmed Pg 55, Stamps, Twine & Ink:  PTI, Kaiser Craft Pearls, Patterned Paper:  Crate (Restoration), Pink Paislee (Picket Fence)

Tree is cut at 5"


Friday, August 17, 2012

Published Gift Set & Banner - February 2012 Cricut Magazine

I Recently had a cute little Ladybug Gift Set published in the February 2012 Cricut Magazine on Pg 44&45.  It is a cute little card with Matching Giftbag that is perfect for any valentines gift! 

I Titled it "Love Bug"

Picture of the matching set

Treat container

Card

I also had this cute Banner Published in the same magazine! 

 XO XO Banner

Close Up

Love Bug – Lady Bug Card
Create a Critter Cricut Cartrige, Pg 62

Patterned Paper:  My Mind’s Eye – Be Loved (Smitten Stripes), Ribbon:  PTI – True Black Party Plaid, Ink:  Papertrey Ink True Black, Cardstock:  Bazzill (white, black, yellow), Sentiment:  Stamping Bella, Button:  PTI Pure Poppy, Yellow Twine:  Stash
  1. Cut 2 shift Hedgehog Lady bugs  in White Cardstock at 3”, trim off the antenee
  2. Cut 1 shift Hedgehog Lady bug in the Black Cardstock, trim off the antenee
  3. Cut 1 shift Layer 2 in black cardstock
  4. Cut 1 shift Layer 3 in yellow cardstock
  5. Cut 1 shift Layer 1 in PP-My Minds Eye – Be Loved (Red Hearts) and Stamp Sentiment in Black Ink
  6. Score ½” of the back white lady bug at the top and glue the top of the scored piece to the front white        ladybug
  7. Glue the Black lady bug to the white ladybug base card.
  8. glue pp layer to black lady bug
  9. Blue yellow layer to black lady bug head
  10. Add bow to head
  11. Pop dot head on bug

Love Bug – Lady Bug Treat Box
Create a Critter Cricut Cartrige, Pg 62

Same supplies as above & Black and White Ribbon:  May Arts
  1. Do the same as above but cut at 3 ¾” and only cut one white Lady bug
  2. Cut a 9 x 8 piece of black cardstock
  3. Score at 3” on all 4 sides of the black cardstock
  4. Along both of the 9” sides cut to the centre point of the squares on both sides
  5. Fold all the score sides in and glue to make a box
  6. Cut a strip of black cardstock 1 ½” x 12” long and glue inside the box to create a handle
  7. Glue Lady Bug to the box


XO Banner
Cricut Cartridge: Birthday Bash (Triangle Banner Pieces) Pg 62
Cricut Cartridge:  Accent Essentials (Lopsided Heart under XO) Pg 67
Cricut Cartridge:  Stamping Solutions (XO)
Patterned Paper:  My Mind’s Eye – Be Loved
  • Triangle Banner is from the Red and Pink Polka Dot (Dearest Dots)
  • Scallop Triangle Banner Green Stripe (Lovely Loops)
  • Heart Punched Shapes – Red Hearts & Striped pp (Smitten Stripes)
  • Squizly Green Stripes  Heart shapes (Fond Flowers)
  • Flowers from the Fond Flowers PP  
  1. Cut 4 of the Triangle Banner using the Font, Material Saver and Quanity Buttons from the Red and pink polka dot pp at 4 3/4”
  2. Cut 4 of the shift Triangle Banner using the Font, Marerial Saver and Quantity Buttons Green Striped pp at the same height
  3. Using an Ek Success Heart Punches cut 2 Large and one Small Hearts and Ink on the the larger hearts on the Red side of the Heart pp with red ink
  4. Fold one large and one small heart in half and glue centre of the Red Large heart to the Large Striped Heart, then do the same with the small striped heart.
  5. Do this again to create 2 3-D Shaped Hearts and glue each heart to a banner piece.
  6. Cut 2 Hearts from Green Squiggly Stripe pp using the shift key and the Accent Essentails heart shape found on Pg 67 at 2 ¾”
  7. Cut 2 XOX0 from the Stamping Solutions Cartridge at 1 ¾” high and trim off the 2nd XO and discard on each cut
  8. Glue the 2 Green hearts to each remaining banner
  9. Pop dot the xo on top of each heart
  10. Cut out 2of the Circle flowers and 2 of the flowers from the centre and pop dot the 2nd flower on the circle flower and glue to inside of the 0.
  11. Add some blue bling to the centre of the flowers.

Tuesday, August 14, 2012

Published Card - January 2012 Cricut Magazine

Here is cute little "Winter Hat" card that I recently had published in the January 2012 Cricut Magazine, Page 41!

I titled it "Baby it's cold outside"


Details:  Patterned Paper:  Echo Park (Everybody Loves Christmas), Cardstock:  Bazzill Bling, Ribbon:  HAKidd (pink), Stamps:  PTI (Snowfall), Ink:  PTI True Black & Hawaian Shores, Glitter:  Crafts From Dollarama (blue), Cricut Expression, Cricut Cartridge:  Simply Charmed (Hat on pg 65), Corner Rounder, 

1)  Using the Simply Charmed Cricut cartridge cut 2 white hat’s  at 3 ¾” from Page 65 using the Shadow feature and the shift button.
2)  Cut another at the same size from the Echo Park (Everybody Loves Christmas -Scallop Stripes) Patterned paper. (snowflake patterned paper)
3)  Cut one more at the same size from the Echo Park (Everybody Love Christmas – Journalling Cards) Patterned Paper. (blue patterned paper)
4)   Cut the Layer 2 using the shift key from Blue Cardstock discarding the cuff cut and keeping the pop pom for the top.
5)  Using the Xyron sticker maker run the blue circle cut through the xyron and apply the blue glitter on the sticky side.
6)Trim the hat cut from the blue patterned paper saving only the cuff portion of the hat.
7) Stamp the sentiment on White Cardstock and trim to the size of the sentiment, round the corners and ink the edges in blue ink.
8)  Attach the sentiment to the blue cuff portion
9) Score the back cut of the white hat at approx 1” from the top of the hat.
10)  Glue the scored top portion to the top cut of the white hat.
11) Glue the Snowflake hat on top of the white card base.
12)  Pop Dot the Glittered Circle (pom pom) on the top of the hat.
13)  Pop Dot the Cuff on the base of the hat and apply white mini pom pom trim
14)  Tie a bow from the pink Ribbon and attach under the top of the hat using a glue dot.

Sunday, March 25, 2012

Published Baby Bib & Tea Towels - Cricut Magazine December 2011

I have 2 Fabric Items that were published in the December 2011 Cricut Magazine!


Christmas Dove Baby Bib - Pg 120 and 121


Festive Tea Towel Pg 122 & 123


Festive Tea Towel Page 122 & 123

Christmas Dove Baby Bib:  Baby Bib:  Martha Stewart; Fabric:  Cosmo Cricket (Green), Michael Miller Fabrics (Red); Fusiable Web: Heat'n Bond; Button:  Papertrey Ink; Jewel:  Dollar Store; Cricut Expression; Holiday Cakes Cricut Cartridge.

Festive Tea Towels:  Tea Towels: Gillett's; Ribbon:  Papertrey Ink; Fabric;  Jo-Ann Craft Essentials (green), Moda (Blue), Mrs. March's Collection (Brown), Susan Winget (Green/red polka dot); Fusible Webbing:  Heat'nBond; Buttons:  Papertrey Ink; Cricut Expression, Christmas Cheer and Joys of the Seasons Cricut Cartridges.

Saturday, March 24, 2012

Published Cards - Cricut Magazine - November 2011

I have 3 Cards that were published in the November 2011 Cricut Magazine


Many Thanks Scarecrow Card Pg 58

Celebrate Autumn Tree Card - Pg 60

Little One Girraffe Card - Pg 104

Many Thanks Scarecrow Card:  Card is 4 1/4"x5 1/2"; Cardstock:  Bazzill Basics; Patterned Paper: Jillibean Soup (Red), Making Memories (Blue); Shredded Crepe Paper:  Michaels; Ribbon:  Offray; Jewels:  Kaisercraft; Sentiment Stamp: Papertrey Ink; Ink:  Memento (Blue), Papertrey Ink (Black); Cricut Expression, Simply Charmed Cricut Cartridge.

Celebrate Autumn Tree:  Card is 3 1/2" x 5"; Cardstock:  Bazzill Basics; Patterned Paper: Crate Paper(Brown), Daisy D's (Blue, Orange), Pink Paislee (Green); Twine, Sentiment Stamp & Ink:  Papertrey Ink; Cricut Expression; Simply Charmed Cricut Cartridge.

Little One Girraffe Card:  Card is 1 3/4"x5 1/2"; Cardstock;  Bazzill Basics; Patterned Paper:  Crate Paper (Yellow); Ribbon:  PTI; Leather Trim: Craft Supply; Twine, Button, Sentiment Stamp, Ink:  Papertrey Ink; Pearls:  Dollar Store; Chalk:  Decorating Chalks; Marker;  Copic; Cricut Expression; New Arrival Cricut Cartridge.

Sunday, March 18, 2012

Published Card & Tag - Create Idea Book - Christmas Cards November 2011

I have a Card and Matching Tag that was published in the Create Idea Book - Christmas Cards that was issued in November 2011


Button Tree Card Page 70 & 71

Matching Button Tree Tag Page 70 & 71

BUTTON TREE: card is 4 x 5 1/2" and Tag is 3 1/2" square, Cardstock, Ribbon, Buttons, Stamps and Ink:  Papertrey Ink; Jews:  Craft Supply; Slot Punch:  Stampin Up; Die Cut Machine:  Cuttlebug, Labels 1 Dies:  Spellbinders Paper Arts; Beacon Adhesives.


Saturday, March 17, 2012

Published Home Decor - Create Holidays Magazine October 2011

I have a Christmas Themed Home Decor Piece that was published in the Create Holidays issue from October 2011.


Joy Wall Hanging Pag 95

JOY WALL HANGING:  Banner is 3x 11 1/4", Photoframes are from Michaels, Carstock:  Bazzill, Patterned Paper: Little Yellow Bicycle, Ribbon, Pearls and Glitter are from Dollarama, Snowflake Button:  Craft Supply, Cricut Expression, Alphalicious Cricut Cartridge for the letters JOY.

Sunday, March 11, 2012

Published Card & Banner - Cricut Holidays Idea Book Oct/Nov 2011

I have a Card and a Banner that were published in the Cricut Holidays Idea Book in October/November of 2011

Chilly Mitten Card Page 24 & 25

Snow Banner Page 76 and 77

CHILLY MITTEN CARD:  Card is 4 x 5 1/4", Cardsock & Jewel:  Bazzill Basics, Patterned Paper:  Crate Paper, Ribbon:  American Crafts(Aqua) and Wrights (Pompom trim), Sentiment & Ink:  Papertrey, Cricut Expression, Christmas Cheer Cricut Cartridge, Simply Charmed Cricut Cartridge.

SNOW BANNER:  17 1/2" Long, Cardtsock:  Bazzill Basics, Patterned Paper:  Echo Park Co., Ribbon, Hole Punch:  Craft Supply, Cricut Expression, Cuttlebug, PTI Die, Don Jaun Cricut Cartridge, Simply Charmed Cricut Cartridge.

Saturday, March 10, 2012

Published Card & Layout - Cricut October 2011 Magaziine


Page 22

Page 29

WITCHES HAT CARD:  Card is 4 1/4"  5", Cardstock, Tulle:  Bazzill Basics, Paterned Paper, Star sticker:  Echo Park, Jewel:  Kaisercraft, Cat Rub on:  Little Yellow Bicycle, Glitter Glue:  Ranger Stickles, Cricut Expression, Mini Monsters Cricut Cartridge.

SO BEWITCHING LAYOUT:  Cardstock:  American Crafts, Patterned paper and stickers:  Echo Park, Crepe Paper:  Party Supply, Ribbon:  BoBunny, Jewel:  Kaisercraft, Glitter:  Dollarama, Scalloped border punches: EK Success, Cricut Expression, Happy Hauntings Cartridge & Paper Doll Dress Up Cartridge.

Sunday, March 4, 2012

Publised Cards - August 2011 Cricut Magazine

I have 2 Cards in the August 2011 Cricut Magazine! 


Page 87- Flower

Page 92 - Just Because


FLOWER DETAILS:  Card is 4 1/4" across.  Cardstock:  Bazzill, Patterned Paper:  BoBunny(pink) and My Mind's Eye (Yellow dot), Glossy Accents, Cricut Expression, Cricut Lite Sugar and Spice Cartridge.

JUST BECAUSE:  Card is 2 3/4" x 4 1/2".  Cardstock:  Bazzill, Patterned Paper: Papertrey Ink (Red), October Afternoon (Blue), Twine, Button, Sentiment Stamp:  Papertrey Ink; Jewels: Craft Supply, Ink:  PTI True Black, Tsukineko (green); Cricut Expression, Country Life Cricut Cartridge.

Sunday, February 26, 2012

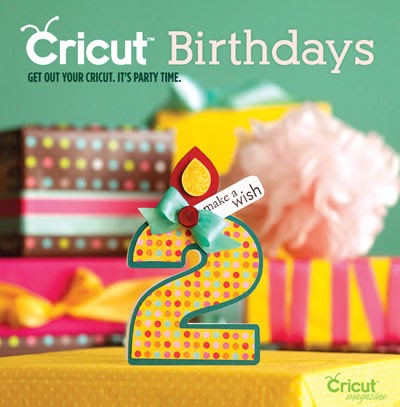
Published Cards & My First Cover Card! - Premier Issue of Cricut Idea Book - Birthdays!

I have 4 Cards in this publication including the Cover Card!!!  Whoo hoo... my first Cover!

You can see they actually did the mock cover with my card but decided to redo the card to make it into a 5 in order to Celebrate Cicuts 5th Birthday! 


Here is my version of the Cover Card!

On the Cover

 Here are the other 3 cards that were published in this magazine! 

Page 11

Page 12

Page 92

MAKE A WISH:  Cardstock:  Bazzill, Patterned Paper:  Echo Park Co, Ribbon:  Michaels, Button, Stamp, ink:  Papertrey Ink, Cricut Expression

Details:  Sweet Treats "candle5" (Shdow/Blackout)(Shift) at 5" - cut 3 2 of the same colour and one of patterned paper "candle5"(shift) at 3 1/4", "candle5"(Layers) at 1 1/2" "candle5" (Layers(Shift) at 1"
Cut the listed shapes from your desired cardstock and/or patterned paper.  Score one of the "candle5"(Shadow/Backout)(Shift) cuts at about 1/2" from the very top of the cut.  Adhere the folded part to the matching color to create the card base.  Adhere the "candle5"(Shadow/Backout)(Shift) cut o top.  Layer the "candle5" (Layers)(Shift) cut on the "candle5" (Layers) cut with foam adhesive and adhere them to the top of the card front.  Stamp a sentiment on a strip of white cardstock and round the right edges of the strip.  Adhere it to the card front just below the "candle5"(Layers) cut.   Tie a bow with ribbon and adhere a button to the centre of the bow.  dd the bow to the end of the stamped cardstock.


CELEBRATE TODAY:  Cardstock:  Bazzil, Patterned Paper:  Die Cuts with a View, Twine and sentiment stamp:  Papertrey Ink, Gilitter:  Ranger Stickles, Markers:  Copic, Tag punch: McGill; Cricut Expession.

Details:  Create a Critter (Layer1 and (Layer3) at 4" (Layer2) at 4" cut 3. Cut the shapes listed above from desired cardstock and/or patterned paper.  Score the top of the (Layer2) cut at 1/4" from the top and adhere the folded part to the top of another (Layer2) cut to create a card base.  Adhere the (Layer1) cut to the front of the card.  Layer the thrid (Layer2) cut and the (Layer3) cuts to the card front. Fill in the dinosaur's eyes and mouth with a black marker and fill the spots on the dinosaur's back with glitter.  Stamp a sentiment on a punched tag to the dinosaur's neck with twine.

Saturday, February 25, 2012

Published Card - Cricut Magazine February/March 2011(Premier Issue)

Over the next month or so I will be catching up on my publications on posts throughout the weekends!  I have recently received another 3 publication packages back so thought I would update my blog!

Dee, Regan and I were all published in the Premier Issue of the Cricut Magazine that came out in February/March of 2011


 Here is the card that I had in the magazine and it is on Page 37!


WELCOME BACK:  Card is 3 3/4" x 4 1/4", Cardstock:  Bazzill Basics, Core'dinations; Patterned Paper:  Die Cuts with a View; Ribbon:  Michaels; PTI: Button, Brown Ink; Pearl:  Dollarama, Glossy Accents:  Ranger; Cricut Expression, Preserves Cricut Cartridge; Font:  Times Roman.

From the Preserves cartridge, die cut two apples from whtie cardstock.  Score the top of one and adhere it to the other apple to create a card base.  Die cut another apple from brown cardstock and adhere it to the front of the card.  Die cut the layers of he apple in green cardstock and red cardstock, and add the leaves and apple to the card.  Use patterned paper for the centre of the apple and adhere brown seeds to it.  Apply a thin layer of Glossy Accents to the seeds.  Print a sentiment onto the white cardstock, cut it out and ink the edges.  Tie a bow with ribbon and adhere it to the edge of the sentiment and attach both to the top of the apple.  Add a button topped with a pearl to the bow.  Glossy Accents give the apple seeds an eye-catching and realistic appearance.

Sunday, November 6, 2011

Published Card - February 2011 Cards Magazine

I have another pulished card in the February 2011 Cards Magazine 


 This card was published in the magazine on Pages 18 & 19 and included in one of the email Newsletters.  It is also featured in the table of contents of the Magazine.


SWEET TREAT:  Cardstock:  Bazzill Basics; Patterned Paper:  K&Company; Ribbon:  Michaels; Twine:  Papertrey Ink; Chipboard, Button:  Craft Supply; Sentiment Stamp:  Stamping Bella; Ink:  Papertrey Ink, Versamark; Embossing Powder:  Ultra Thick Embossing Enamel; Glitter:  Making Memories; Marker:  Copic; Cricut Die Cut Machine; Sweet Treats Cricut Cartridge.

Using the Sweet Treats Cricut Cartridge, die cut a cupcake card base from white cardstock.  Diecut another cupcake and its elements from cardstock, patterned paper and chipboard.  Adhere the cupcake liner to the pink cupcake base, and tie a ribbon into a bow on the right side.  Add the top layer of the cupcake and adhere the entire piece to the card front.  Adhere the cardsstock heart to the chipboard heart and apply glittered embossing powder before attaching to the top fo the cupcake.  Stamp a sentiment onto a white cardstock strip and attach to the heart.  Colour the twine with a marker to make it red and tie it through a heart button, then glue it to the sentiment.  Apply glitter to the slots of the cupcake liner.

Tip:  Create your own glittered embossing powder by adding one part glitter to two pars embossing powder then use as normal.

Saturday, November 5, 2011

Published Card - January 2011 Cards Magazine

My Very First Publication!
I thought I might start updating my blog with some of the publications I have had over the last year. 


Here is very first card that was published back in the Cards January 2011 edition,the Card is on Page 45.


I LOVE YOU SO MUCH:  Cardstockm, butttons, stamps:  Papertrey Ink; Patterned Paper:  Die Cuts with a View; Stickpins: Fancy Pants Designs; Ribbon:  Celebrate it from Micheals; Fabric:  Craft Supply; Jewels:  Dollarama; Ink:  Memento, Papertrey ink; Markers: Copic; Punches;  Stampin' Up (Split punch & Slot punch); Die cut machine: Cuttlebug, Dies:Cuttlebug flowers, Spellbinders Label 1

Create a card of white cardstock and cover the front with green patterned paper.  Punch a scalloped border and attach it to the right side of the card.  Die cut three fabric flowers in different sizes (2 in pink fabric and one in brown fabric using the flower cuttle bug die, then die cut the label and ink the edges.  Colour in the flowers leaves with a marker.  cut out a 2" circle of the brown fabri and stitch a basting stitch around the edge.  Pull the tread so the ircle gathers and makes a yo-yo flower.  Adhere it to the label and add a fabric flower.  Layer both with flowers, buttons and jewels.  Adhere the label to the right side of the card with foam adhesive.  Thread a ribbon through the hole punch and place stick pins through the bow.


Sunday, March 6, 2011

1st Magazine Publication! - Cards January 2011

This is my very first published card!  And I have been so excited about seeing it in the magazine!  I basically ran to the Post Office when I knew my copy had arrived! 
  
Cover of  Magazine

Card can be found on page 45!
 Here is a photo of the card! 

I could not post it right away and so thought enough time had passed by that I could go ahead and post it now on my Blog!