Monday, October 31, 2011

Happy Halloween - Witches Hat

Happy Halloween Everyone!
I just found this new SVG site and could not resist making one more Halloween Item!  So here it is!


Items Use:  Witch Hat from SVG Attic, Echo Park (Times & Seasons - Fancy Damask) Patterned Paper, Black mini Boa from Creatology, Ribbon is Basic Basic from Micheals, Kaisercraft Sparklets, Stamp:  PTI Halloween Treats & Sweets, Ink: PTI True Black

I cut the SVG file at 7" and attached the brim to the cone and added the boa, made a Ribbon Rosette and added the bling to the centre.

Wednesday, October 26, 2011

LRW - Challenge #104 - Inspiration Picture


The challenge for this week is an inspiration photo!


I must say that his cake is just gorgeous!  I took the inspiration of the fact that it was a cake and used the colours white and yellow from the inspiration photo and created another cricut cake creation!


I have to say this bannana bar recipie is very tasty too!!! 

Friday, October 21, 2011

TSF Friendzy Friday - The Multiple Uses of Copics!


Did you know that you can use your copic markers to change the colours of items?  Here are just a few examples!  First up I will show you how you take clear Kaisercraft Sparklets or any Bling and by just colouring them with a copic you can totally transform the look of them!

All you need is a little bling and a copic marker! 

Colour in your bling until you like the colour!
And now you have a different colour of Bling!


 Here is just another example of what you can colour with your copics!  Here I coloured some regular twine Orange to match my layout !


 Here is a close up of the coloured Twine!  I coloured it the same way I coloured the bling! 

Happy Colouring!

Thursday, October 20, 2011

TSF - American Crafts (Amy Tangerine) Reveal #4 - Picture Purrfect Layout


Here is my final reveal using the American Crafts Amy Tangerine Line! 
I handcut the Sun and cloud from the Patterned paper and when attaching it I made sure that some of the sun rays overlapped the phot.  Here I again used an exacto knife to trim around the camera on the Patterned paper and sliped my cute little photo of my cat Miko outside soaking up the sun on our Front porch off the Master Bedroom!  I cut a few scalloped Strips of patterned paper using my Split punch from Stampin Up but any scalloped punch would work just perfectly! 

I added som Sassafrass Cardstock Stickers and some Bella Blvd Chipboard Letter stickers and added some punched hearts to the centres of the letters!  As you can tell I just could not resist the play on the word perfect by changing it to purrfect because of Miko!

I added a little journaling strips along the side and added some popdots to some of the journal strips!

Here is a close up of the scallops!

Products Used:  PP American Crafts (Amy Tangerine), Sassafrass Cardstock Stickers (Title), Bella Blvd Sofphisticates Chipboard Letters (Title), small Heart Punch, Stampin Up Split Punch (scalloped strips of pp).


Wednesday, October 19, 2011

LRW - Chalelnge #103 - Fall Themed Project x2


The challenge for this week on Little Red Wagon is to create a Fall Themed Project!  So I decided since I was off I would create 2 very different projects to kick off the challenge for week!  I have created both a card and some cookies using a Cricut Cake Machine!  (My very first attempt at something on this new machine!!!) 
First Up is this little Pumpkin Card!

I used the Create A Critter Cricut Cartridge the cut is on Page 70 and I cut it at 4" 2 times and cut away the sides on the 2nd piece.  Items used are:  PTI Sentiment, PP - Echo park Dots and Stripes, Bo Bunny Double Dot, Twine and Button are also PTI products!

And next up!  Here are some cookies I made!!!

I used the Cake Basics Cricut Cake Cartridge and cut some sugar cookies and matching marshmellow fondant in the Cricut Cake Machine at 3 1/2"

Considering this was my first time ever using the machine here are are a few tidbits of helpful hints!!! One - you have never rolled your dough or fondant enough!!!! I used the Wilton Orange Rings on the Wilton Roling pin and kept rolling till the dough did not move any more!! This is then the perfect thickness - I used a Medium speed and Max pressure on the dials and freeze the dough rolled on the mat for 30 min before cutting and the fondant for 1 hour before cutting! And voila - here you have it!

I hope you can play along with us this week, link up your projects and don't forget to check out what the other "Girlfriends" have created! 


Tuesday, October 18, 2011

TSF - American Crafts (Amy Tangerine) Reveal #3


Todays Reveal is another 3D Project that I have created using 2 SVG Files that I found online at My Time Made Easy   The Tulips SVG File is Called Tender Tulips from the My Time Made Easy SVG Shop.  Here I created them from the Patterned Paper and I covered Straws with patterned paper to use as the stems.


The other SVG File I used was the Fresh Popped Popcorn Box from the My Time Made Easy SVG shop.  If you score the top and fold it down it looks like a flower pot!  I used Some Bo Bunny Double Dot paper to create the base and Embossed the Off White cardstock with the Cuttlebug Divine Swirl Embosing Folder.

I then Cut the Frame from the Patterned Paper and added the Cloud Sticker and then stamped the Word Sweet from the American Crafts Line in Brown ink on off white cardstock

To give the Pot some weight I added a few beans and covered them with some moss I had in my stash.  This will also help the tulips to stand up in the pot.


PRODUCTS USED:  Patterned Paper American Crafts (Amy Tangerine) - Frame & Tulips, Cardstock (Off White), Bo Bunny Double Dot (Brown), My Time Made Easy SVG Files (Tulips, Flower pot), American Crafts Remarks Stickers - Friends (Cloud Sticker), Sweet Stamp (American Crafts), Cuttle Bug Embosing Folder (Divine Swirl), Straws, Beans, Dry Plant Moss

Monday, October 17, 2011

TSF - American Crafts (Amy Tangerine) Reveal #2


 Here is Reveal # 2 for the Amy Tangerine Line from American Crafts!    Here is a very simple layout I created about things I enjoy in life right now!


I cut the Scalloped border at 1 1/2"  using the Elegant Edges Cricut Cartridge(Pg 23) and topped the border Strip with a rosette trim I had left over in my stash...  I added the Thickers Chipboard Letters for the title!

I choose to cut the frames from the Patterned Paper and attach them in the corner to use for my Journaling on the layout! 

There was a details sticker from the other American Crafts Line Daydreams that I played with and I thought it was just too perfect for the flower on the righthand bottom corner.  I changed it up a bit because it had some orange bling in the centre and wanted the centre of the flower to match the page better so I replaced it with some bling from Basic Grey that I had in my stash!


PRODUCTS USED:  PP American Crafts (Amy Tangerine), Cricut Cartridge Elegant Edges (Scallop Trim), Prima trim (Grey rosette Trim), Thickers Elf Chipboard Letters (Title), Martha Stewart Monarch Butterfly Punch (Butterflies), American Crafts Details Stickers - Chirpy (Flower), BasicGrey Designer Half Pearls Opaline (Bling for centre of the flower)

Tomorrow I will show you how I created some 3D Paper Tulips!

Sunday, October 16, 2011

TSF - American Crafts (Amy Tangerine) Reveal


It is time for me to start revealing the products I have created using some new American Crafts Lines from Two Scrapbook Friends - Here is a project I created with some of the Amy Tangerine Line - over the next week I will reveal some of the items I created with this very cool line! 


Here is a layout I did with my youngest Nephew!  As soon as I had seen the paper I knew this picture would be absolutely perfect! Using an exacto knife I trimmed around the cloud on the patterned paper and sliped the photo in behind the trimed cloud.  I added the title using two different Thickers and then added the delightful Remarks Sticker.

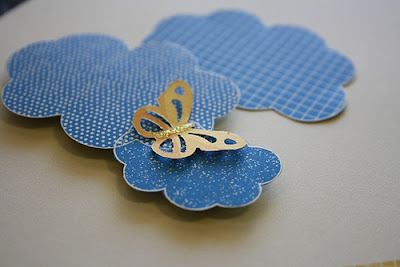
Here is a close up of the Clouds that I had hand cut from a second piece of paper and then I punched some butterflies from a Martha Stewart Monarch Punch and pop dotted some of the clouds.  I added a little bling and stickles to some of the butterflies!


 Here is a close up of the Title


PRODUCTS USED:  Patterned Paper American Crafts - Amy Tangerine, Thickers -Typo Chipboard Stickers (Title), Thickers - Amy Tangerine Lovely Foam Rubber Stickers (Title)  some Pearls by Queen & Co and some Stickles (butterfly's)  and a Martha Stewart Monarch Butterfly Punch

Wednesday, October 12, 2011

LRW - Challenge #102 - Use a Ticket!


 The Challenge this week was to use a ticket! So I decided to create this little popcorn box and use some movie tickets on it!


Details:  The popcorn box was created using the the Tags, Bags, Boxes and More Cricut Cartridge, I cut the box using the fit to page feature to make it as large as I could on the 12x12 Mat.  Patterned Paper:  is Jillibean Soup Staples, The Tickets are created using the Matching Stamp Die Set from My Favorite Things.  Button, Twine and ribbon were from my stash!

Wednesday, October 5, 2011

LRW - Challenge#101 - Give Thanks!

This weeks challenge on Little Red Wagon is to Give Thanks!  I figured this cute little Turkey Dude did just that!

I created him using the Create A Critter Cricut Cartridge and cut him at 4"  I cut an extra layer of the Yellow and Red Feathers to give him a more dimenional look!  Patterned Paper:  Bella Blvd (Finally Fall), Sentiment is PTI Tag its#7  Twine and button are also PTI